
If you are familiar with the basic plans offered in the world of web hosting, you might have come across the term Reseller Hosting. In simple words, reseller hosting is when you purchase hosting from a parent firm, and then resell that hosting space to your own clients.
Of course, the “reselling” is not the only usage of such web hosting plans. If you have multiple websites, either your own or those of your friends and clients, you can still opt for a reseller hosting package and host each site in its own control panel.
So, what exactly is the buzz about reseller hosting accounts? And how do you set one up? This guide shall provide you will all the details and starting points that you need to get started with reseller hosting right away.
Getting Started With Reseller Hosting
Why Should You Go With Reseller Hosting?
The first and most obvious usage of reseller hosting plans is to resell web hosting to end clients. Say, you are running a web design business. By opting for a reseller hosting plan, you can diversify your offerings and even provide web hosting to your design clients, thereby making extra revenue in the process.
Even more so, by having a reseller hosting package, you can be sure that your parent firm will take care of things such as server uptime, data center location, server security, DDoS attacks, etc. You can just focus on running your new web hosting business.
However, even if you do not wish to resell web hosting, having a reseller hosting plan for multiple sites is definitely a better idea than using addon domains to host different sites on the same cPanel account. In reseller hosting, you give each website its own control panel and share of resources, such that if one website misbehaves or is compromised, the other sites are left unharmed.
Naturally, as you can see, reseller hosting has several advantages of its own. It operates much the same way as shared hosting in terms of usage etc, but of course, since there are multiple websites involved, there are many other aspects to be configured in reseller hosting as compared to shared hosting. This might include setup of WHMCS, WHM, etc.
What are all these about? Carry on reading as we learn more!
The Basics
Getting a reseller hosting account is fairly easy with Jolt. All you need to do is figure out how much space and bandwidth your websites will require, and then opt for the relevant plan. Much like shared hosting, you can upgrade or downgrade your reseller hosting plans as well, as per your needs.
Jolt’s pricing is competitive and straight-forward. The servers powering our reseller hosting are fast, reliable and meticulously maintained. And each reseller hosting plan comes with dedicated IP addresses, free domain names, as well as a 45-day money back guarantee.

Once you picked the plan that’s ideal for you, and the purchase is completed, you will get a Welcome Guide email straight to your inbox. That email will have all the information that you might need: nameserver info, cPanel and WHM URLs, FTP details, and a lot more. Be sure to save that email.
Now, each individual site in a reseller account is managed independently, much like you would if it were hosted in a shared account. Thus, there is a separate cPanel account for each site, with its files and data being accessible therein.
However, as the owner of the reseller account, whether you use it to literally resell web hosting or for your own different websites, there are certain additional concepts that you need to be aware of.
WHM
In addition to cPanel, reseller hosting involves another control panel: WHM, or Web Host Manager.
Basically, WHM is to reseller hosting what cPanel is to shared hosting. Web Host Manager, as the name suggests, is what you use to manage your reseller hosting account in its entirety. This is where you can add separate websites, create hosting plans for your customers to choose from, and edit or modify bandwidth and storage quota for your sites.
There is a lot to learn about WHM, but not everything needs to be mastered at the earliest. Your reseller hosting introduction email is a good place to start, as it will have a separate section about WHM details which will teach you how to create a new account using WHM.
Let us took at the steps involved in creation of a new package as well as a new account in WHM.
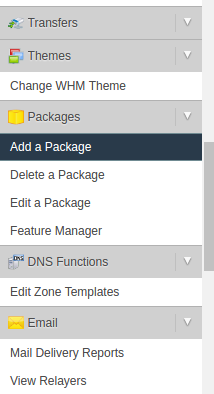
Add a Package
To create a new package, first login to your WHM using the login credentials specified in the welcome email. In the menu on the left, scroll down to the Packages section, then click Add A Package.
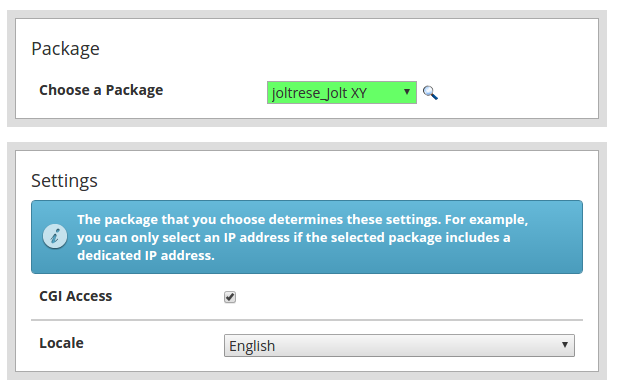
You now need to specify a name for the package, and then the limits for that given package, such as the storage and bandwidth quota, FTP accounts and sub-domains, etc.
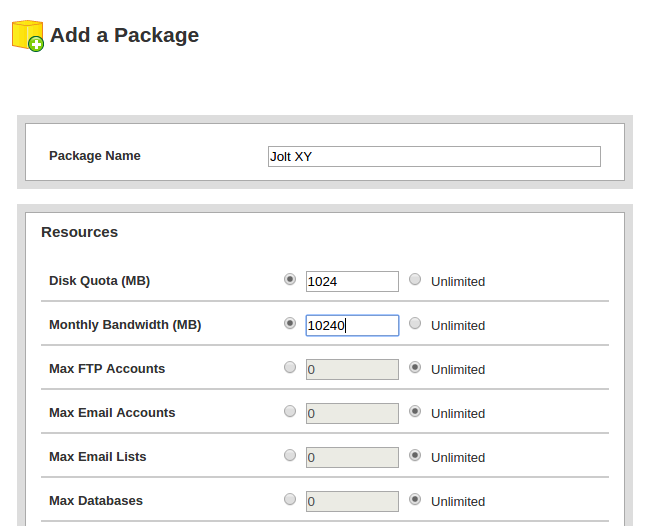
Once done, simply create the package. You can repeat this process for as many packages as you wish to add.
Create an Account
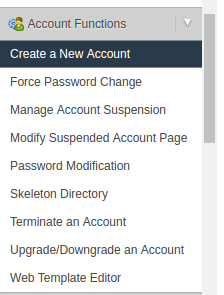
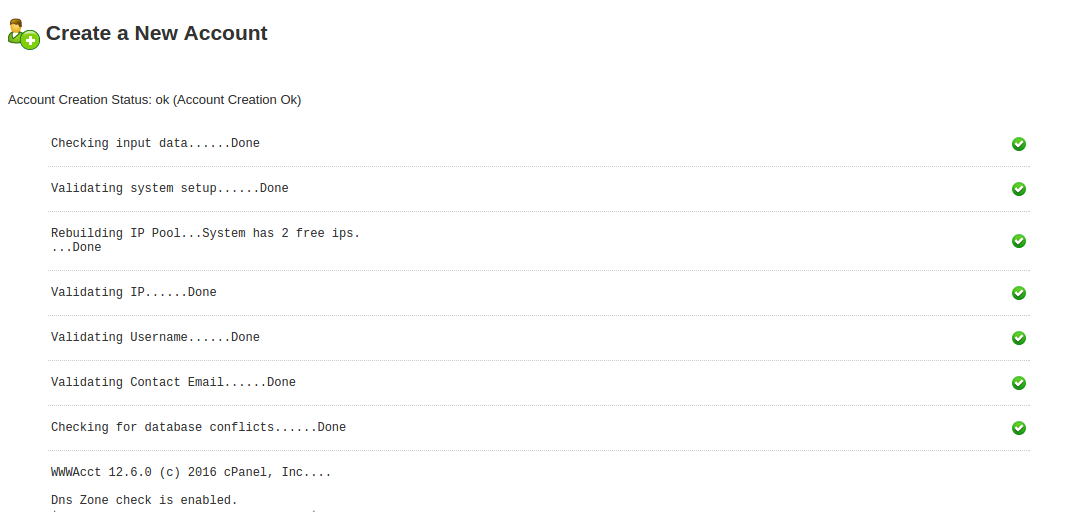
Similarly, to create a new account, head to Account Functions menu and select Create a New Account.
You need to specify details such as the domain name, cPanel username and password, as well as the email of the website manager (use yours if you will be managing the cPanel of this given website).
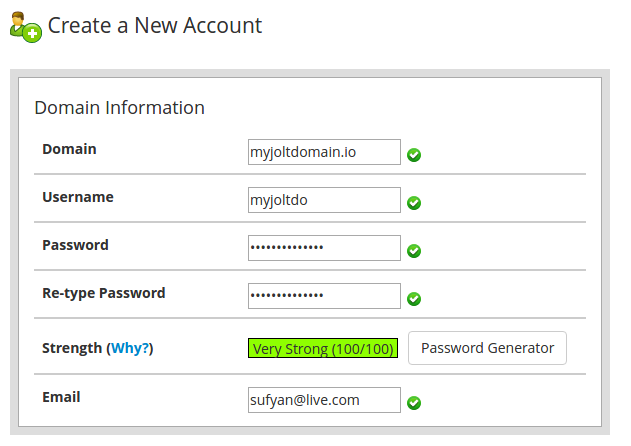
You can also choose the package that you created above, and then create the account.
Once done, you will be presented with the details, which shall be success if all went well, or any error messages if something went wrong. You will also get an email with the said details.
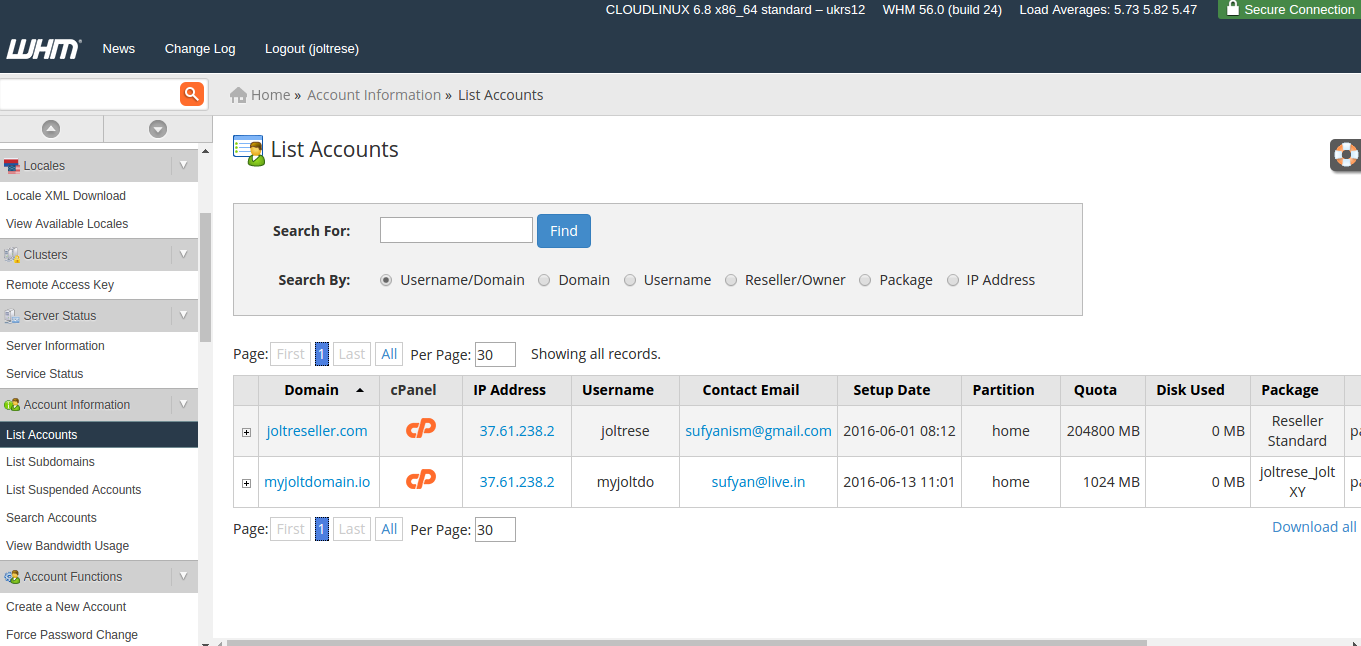
At any time, you can select List Accounts from the Account Information menu to take a look at all the accounts in your reseller hosting account.
For further actions, such as updation of packages and suspension or deletion of accounts, head over to the Jolt documentation about WHM.
WHMCS
WHMCS is a premium product that you get free of cost when you purchase a reseller hosting package from Jolt. If you are using your reseller hosting account mainly to host your own websites, you may not require WHMCS. However, if you wish to resell hosting, WHMCS is almost a necessity and pretty useful to have.
Basically, WHMCS is a one-stop control panel solution for web hosting billing and automation. It lets your customers sign up for the plan they need, pay you, and allows you to handle subscriptions and billing. It is highly flexible, customisable and secure. In fact, a vast majority of large and small web hosting providers use WHMCS to handle billing and automation.
As already mentioned, WHMCS is a paid product, with the cheapest plan being $15.95 per month. However, Jolt allows you to use a fully-licensed version of WHMCS free of cost with Reseller Premium plan. In case you choose Reseller Mini, Reseller Standard or Reseller Professional plan, the license will cost you only £5 + VAT/month.
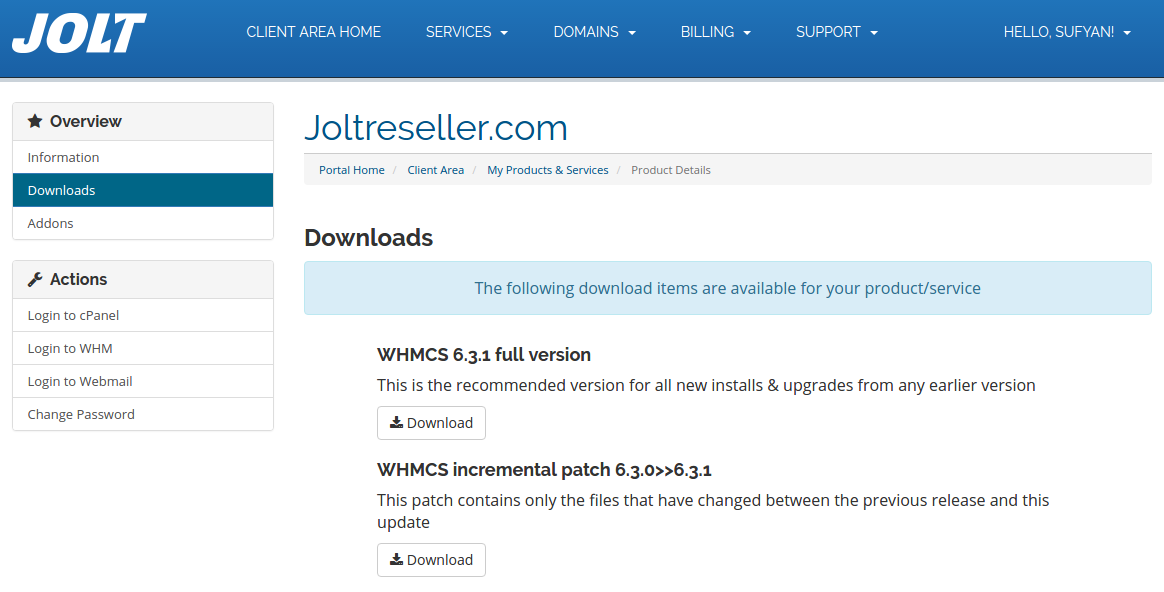
Once your reseller account is activated, you will get an email with the WHMCS details. Thereafter, all you need to do is login to your client area, and head to the Products list, and then click on your hosting package and select Downloads.
Once you have downloaded WHMCS, you can install it with the help of instructions from this page. Once again, this is a premium product that is being offered to you free of cost as part of your reseller package, though support for WHMCS will be provided by WHMCS team directly. Any issues? Simply open a ticket with them.
After you have installed WHMCS, you can activate it by means of the license key provided to you by Jolt via email. For usage instructions related to WHMCS itself and not reseller hosting per se, check out the WHMCS documentation. You can also check out WHMCS demo before setting it up.
Conclusion
By now, you have a basic idea of how to use WHM to create and list accounts, as well as create and update packages. You have also learnt the details about WHMCS to automate and manage billing in your web hosting business.
As always, if you ever run into any confusion, help is always at hand when you choose Jolt to be your web hosting provider.