Considering the fact that WordPress powers over 25% of the total internet, it is only natural that it is the first choice of many users for building their websites. Jolt makes it easy for you to build your sites using WordPress. Irrespective of the hosting plan that you are on, you can install and get started with WordPress within a few minutes.
Wondering how to install WordPress on your Jolt hosting account? You’ve come to the right place! In this article, we will learn how to install WordPress on your Jolt account.
Installing WordPress on Your Jolt Hosting Account
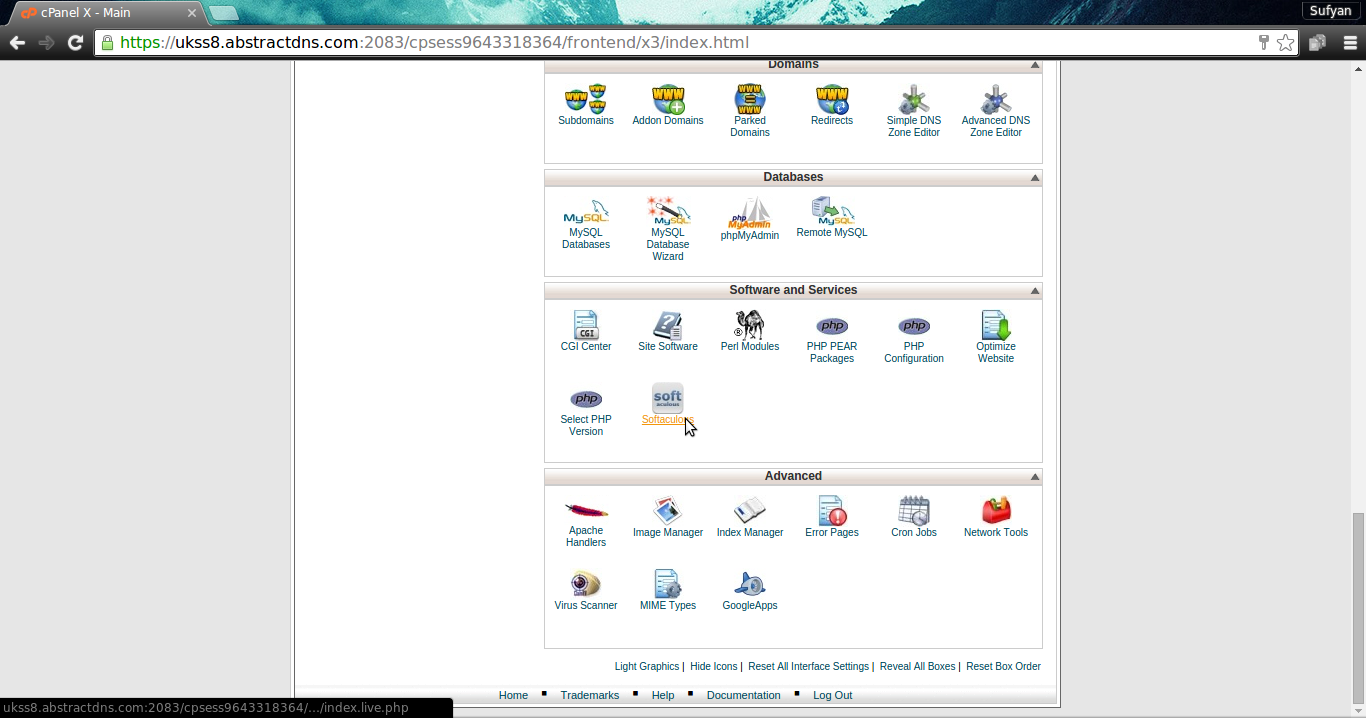
First, you will to login to cPanel. Thereafter, scroll down, and open Softaculous Script Installer. Softaculous is a powerful and easy to use application that lets you install hundreds of tools and scripts, including WordPress.
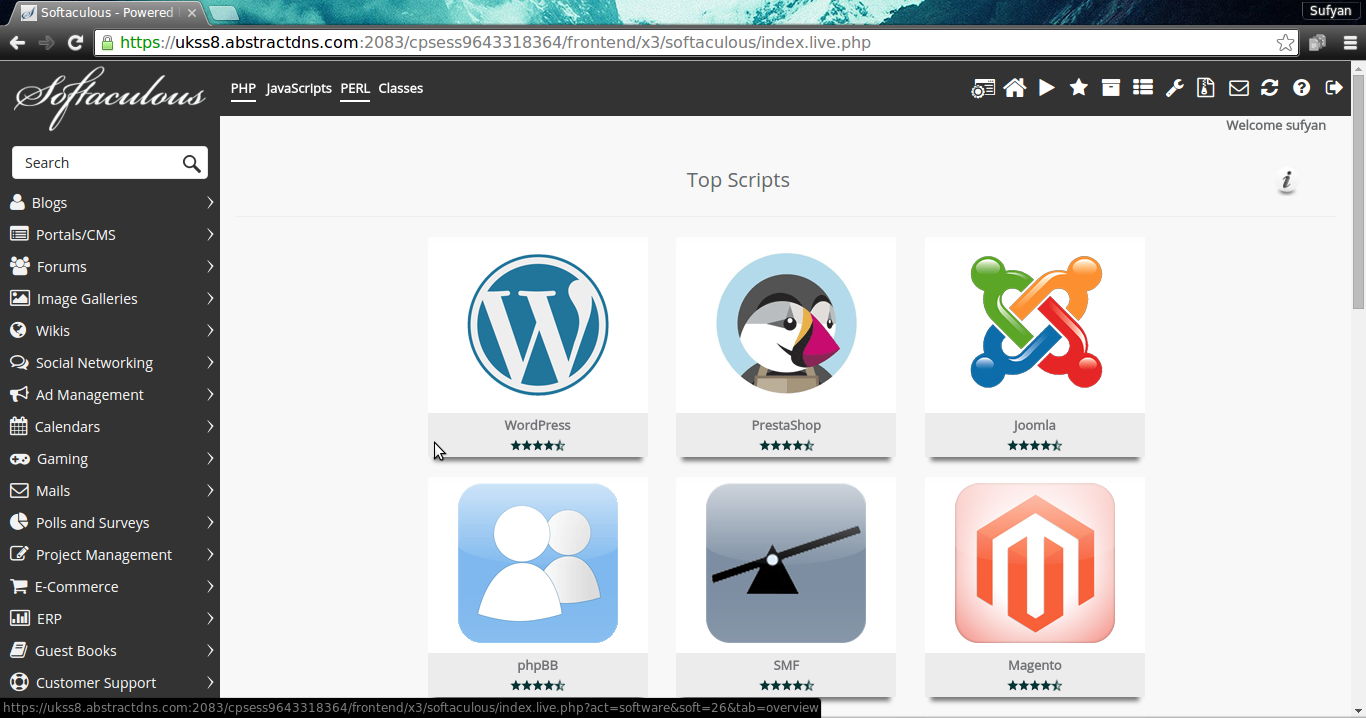
Next, once you have opened Softaculous, you will find WordPress right there, in the popular scripts section. Alternatively, you can locate WordPress from the Blogs section on the left.
Once you click Install, you will be taken to the installation screen for WordPress in Softaculous. This is where you need to enter the details for your WordPress site.
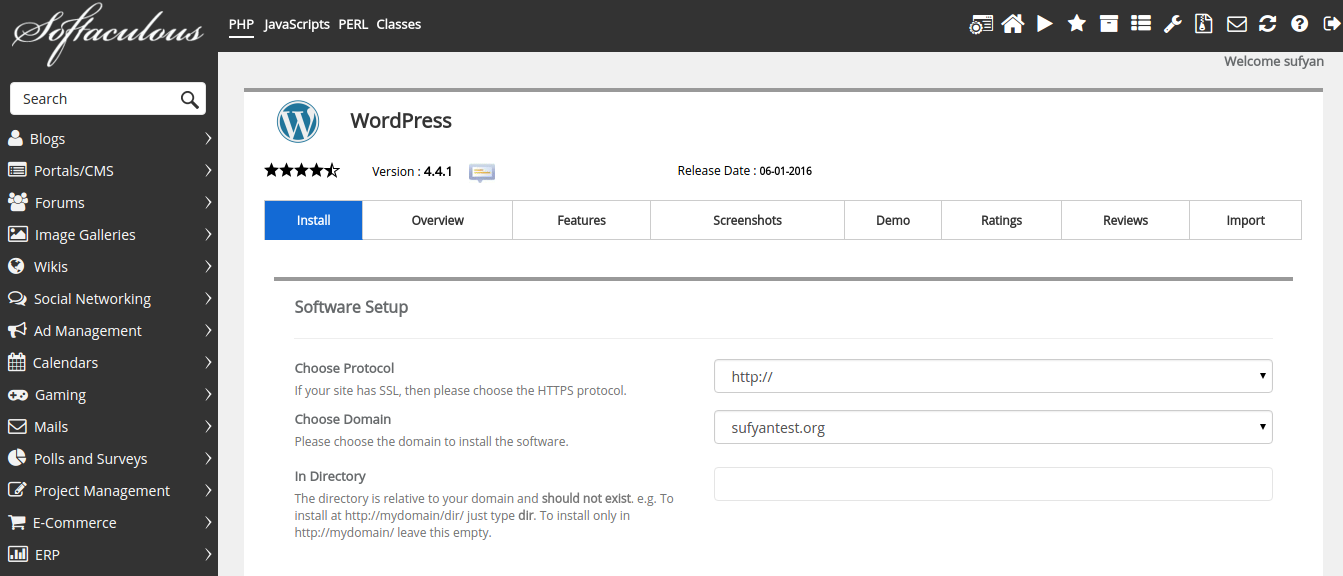
Here is a quick run-down of what you will have to enter:
- Choose Protocol: If you have purchased and setup an SSL certificate, select https, else opt for http. Depending on whether you want www shown in the address bar of web browsers when accessing your site, opt for the relevant option.
- Choose Domain: If you have multiple domains on the same account, select the one on which you wish to install WordPress.
- In Directory: If WordPress is the only CMS you’re going to use, leave it empty (by default, it is “wp”, and you can delete that text). If you wish to install WordPress on a sub-section of your site, say, yourwebsite.com/blog, enter “blog”, and so on.
Upon scrolling further down, you will notice some more options. These pertain to your WordPress site administration.
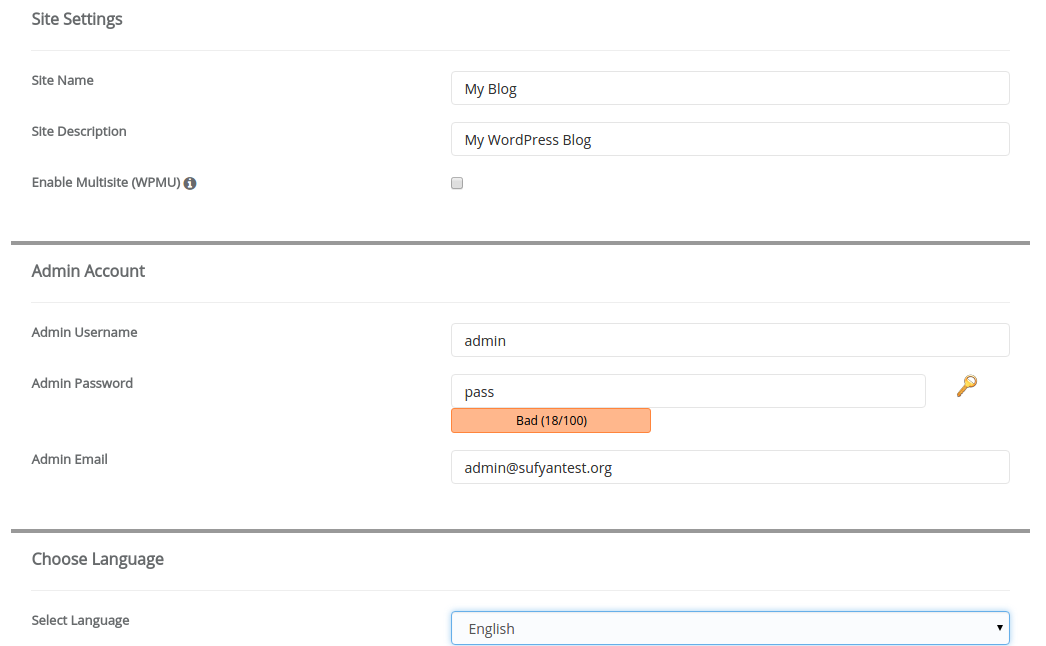
- Website Name and Description: Enter your site’s name and description. You can edit this later too in WordPress admin panel, by going to Settings→General.
- If you wish to enable Multisite, tick the check box (if you do not wish to use to WPMU, or have no idea what it is, leave it unchecked).
- Then, enter your administrator’s username and password, and email. A good idea is not to use the default “admin” user. Be sure to select a strong password.
- Last, you can select the default language of your WordPress installation.
You are now all set, and you can install WordPress. However, if you wish to do so, you can tweak the Advanced Options as well.
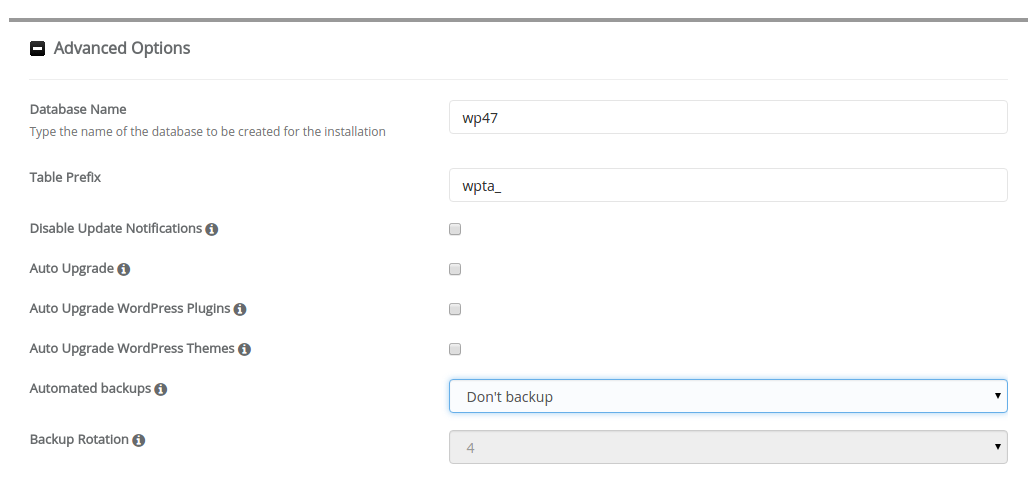
- You can specify custom database name and table prefix. As a security measure, it is a good idea to replace “wp” with some other letters, so as to make it difficult for malicious users to guess your database name.
- You can disable auto upgrade and update notifications for WordPress, themes and plugins. Note that this will disable Softaculous’ notifications — if you install a custom plugin in WordPress, you will still get notifications about upgrades, etc.
- Lastly, you can choose whether or not to backup your WordPress site. Note that these backups are good to restore your site on your own account, or on another account with the same domain name and installation details, as the database is backed up as-in. In other words, if you ever move a Softaculous backup of site1.com to site2.com, you will not be able to use it unless you modify your WordPress database.
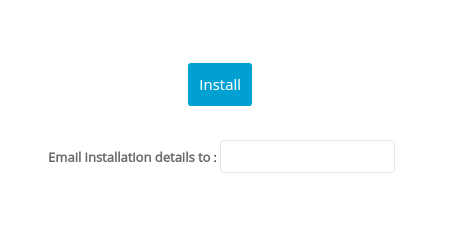
Once you are all done, hit the Install button at the end of the page. Softaculous will send installation details to the email address associated with your account. If you want the details on another address as well, enter that in the field given below the Install button.
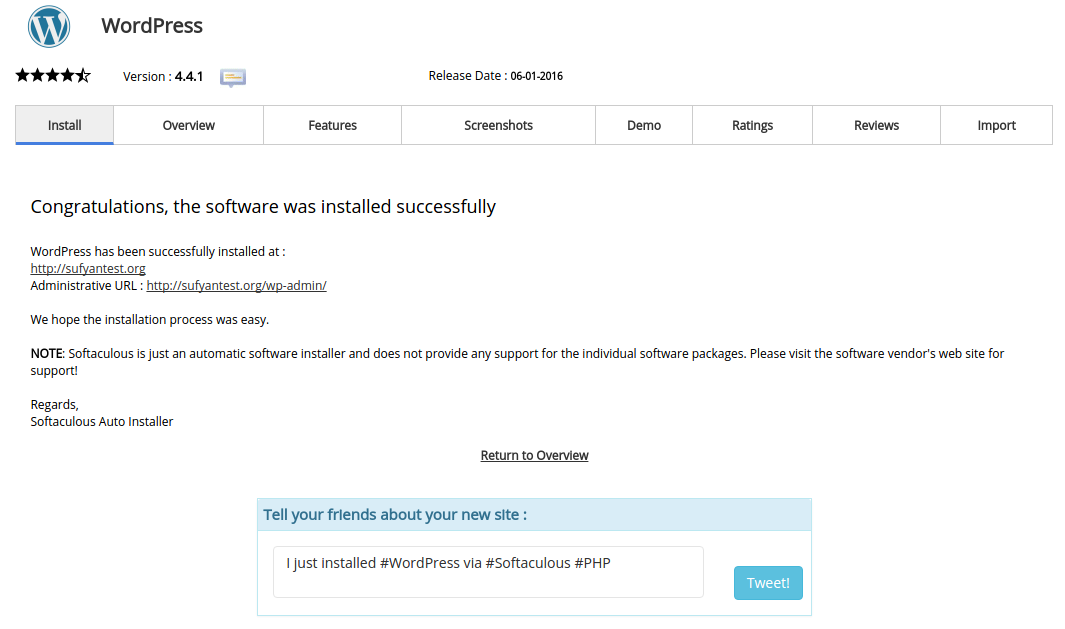
This is it. Once WordPress is installed, you will get the message as shown below, and you can start using WP on your site.
Easy, wasn’t it? Got any doubts or questions? Share them in the comments below!